
Table of Contents
- Signs Your Chicken Coop Has a Moisture Problem
- Chicken Coop Ventilation Requirements That Actually Work
- How to Stop Chicken Coop Ammonia Smell at the Source
- Best Bedding for Chicken Coop Moisture Control
- Monitoring Humidity: Hygrometers and DIY Tools
- Structural Fixes for Coop Moisture Levels
- Seasonal Coop Moisture Management
- Why Moisture Management Protects Your Whole Flock
- Frequently Asked Questions
Last Updated: September 14, 2026
Signs Your Chicken Coop Has a Moisture Problem
If the air feels heavy and bedding clumps instead of crumbling, you have a coop moisture problem. Catching the signs early matters, because damp conditions damage flock health long before the smell becomes obvious.
The clearest warning signs of excess coop moisture include:
- Condensation on walls and windows, especially in the morning
- Clumped, matted, or soggy bedding that no longer breaks apart
- A sharp ammonia smell within a day or two of fresh bedding
- Frostbite on combs and wattles in winter, caused by damp cold rather than temperature alone
- Respiratory symptoms such as sneezing, wheezing, or rattling breath
- Frozen or damp patches on the coop floor that never fully dry
A single wet spot is rarely the real problem. Moisture accumulates from respiration, droppings, spilled water, and ground seepage at once, so fixing one source while ignoring the others means dampness returns within days.
A common mistake is reaching for more bedding to soak up the mess. That treats the symptom, not the cause. According to extension guidance on poultry housing ventilation, ammonia and moisture build up fastest in coops with poor air exchange, which is why ventilation comes before every other fix.
Chicken Coop Ventilation Requirements That Actually Work
The requirement that matters most is continuous air exchange without drafts on the birds. A coop needs roughly one square foot of permanent vent opening per bird, positioned high on the walls so fresh air enters above the flock and stale, moist air escapes (extension.psu.edu).
Ventilation is the single most effective tool for controlling coop moisture. Warm, moist air rises, so high vents let it leave while cooler, drier air replaces it from lower openings, keeping humidity down without chilling the birds.
Here is how to set up ventilation that works in practice:
- Cut high vents near the roofline on at least two opposing walls for cross-flow.
- Keep vents open year-round, even in freezing weather. Cover them with hardware cloth to block predators.
- Add low-level intake openings so air has a path to travel.
- Avoid drafts at roosting height. Chickens should never sit in a direct breeze.
- Check airflow with a smoke test. A smoldering incense stick should show air moving steadily out the high vents.
The difference between good and bad ventilation is not the size of the openings but whether air actually moves. Plenty of vents with no cross-flow still stays damp.
How to Stop Chicken Coop Ammonia Smell at the Source
Stopping ammonia smell means removing the moisture that lets it form. Bacteria breaking down uric acid in droppings release ammonia, and that process accelerates in wet litter, dry bedding produces far less ammonia than damp bedding, even with the same number of birds.
The fix is two-part: keep litter dry, then neutralize what it cannot absorb. That is where a mineral amendment earns its place.

At Arden Line, we make a coop deodorizer from 100% natural volcanic zeolite, a porous mineral that traps ammonia and moisture instead of masking odors. It works by adsorption, pulling ammonia molecules into its structure so the smell is gone at the source.
A simple ammonia-control routine:
- Remove wet or soiled bedding daily from under the roosts
- Stir dry litter several times a week to release trapped moisture
- Apply a mineral amendment to the floor and dropping areas
- Reapply after each full coop clean-out
- Check for smell at bird height, not standing height
If you can smell ammonia at roosting height, the level is already high enough to irritate respiratory tissue. Your nose at standing height is not a reliable gauge.
Best Bedding for Chicken Coop Moisture Control
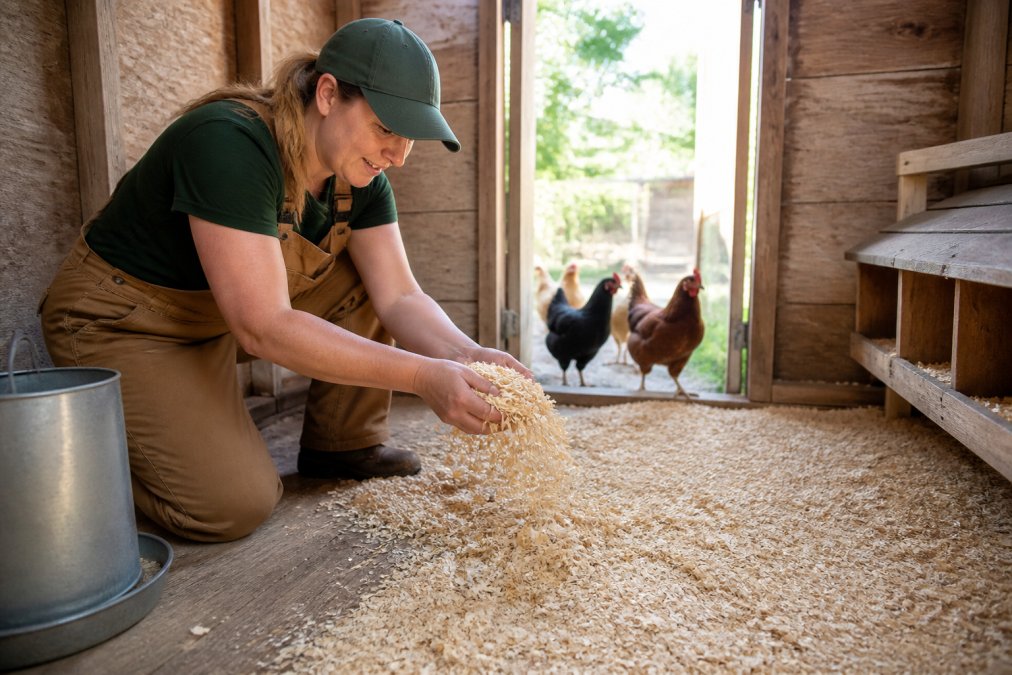
The best bedding for coop moisture control absorbs water quickly and releases it through evaporation. Pine shavings, hemp, and coarse sand all outperform straw, which mats down and holds dampness against the floor.
Bedding choice drives how much moisture your coop holds:
| Bedding Type | Moisture Absorption | Best For | Watch Out For |
|---|---|---|---|
| Pine shavings | High | Most coops | Dust with fine cuts |
| Hemp | Very high | Damp climates | Higher cost |
| Coarse sand | Moderate | Deep litter setups | Heavy to shovel |
| Straw | Low | Nesting boxes only | Mats and stays wet |
| Deep litter mix | High | Cold climates | Needs regular turning |
The deep litter method, where compostable bedding builds up and breaks down over months, works well when managed. It fails when litter stays wet, because anaerobic breakdown produces ammonia and pathogens. Turn the litter and add dry material whenever it clumps.
A mineral amendment layered under bedding adds another line of defense: zeolite keeps working after shavings are saturated, extending time between clean-outs.
Monitoring Humidity: Hygrometers and DIY Tools
A hygrometer is the only reliable way to know your coop's actual humidity, and it costs less than most people expect. The ideal range is 50% to 70%; above that, moisture accumulates on surfaces and in bedding (extension.umn.edu).
Place it at bird height, away from the door and out of direct sun. Digital models with min/max memory show overnight swings, when humidity typically peaks. For DIY, a wet-bulb thermometer paired with a dry one lets you calculate relative humidity using a standard chart, less convenient but accurate enough for a backyard setup.
Why Relative Humidity Alone Misleads You
Relative humidity is a ratio, not a fixed amount of water. Warm air holds far more moisture than cold air, so the same 70% reading means very different things at 40°F and 80°F, the biggest reason keepers misread their hygrometers.
The number that actually predicts condensation is the dew point, the temperature at which air can no longer hold its moisture and starts depositing it on surfaces. When the dew point sits within a few degrees of your coop's nighttime surface temperature, water beads on walls, roosts, and combs regardless of the humidity percentage.
A cheap indoor weather station that displays dew point tells you when condensation is likely, so you can vent more before frostbite risk rises. If yours does not report it, estimate it from dry-bulb temperature and relative humidity using a standard psychrometric chart, which most extension offices publish free.
Turning a Reading Into an Action
A hygrometer is only useful if it changes what you do:
- Relative humidity above 70% at bird height: increase ventilation immediately, open or enlarge high vents, and check that cross-flow is actually happening.
- Dew point within 5°F of the overnight low: expect condensation on walls and combs. Add ventilation before dark rather than waiting for morning.
- Relative humidity below 40%: the coop is likely too dry and dusty, which irritates airways. This is uncommon in winter coops but possible in arid climates with aggressive venting.
- Wide day/night humidity swings: normal, but a swing of more than 30 percentage points usually signals the coop is sealed too tightly at night.
Choosing and Placing a Hygrometer
Not all hygrometers are accurate. Inexpensive analog dials commonly drift by 5 to 10 percentage points and cannot be recalibrated, enough error to make the reading useless. Digital models accurate to plus or minus 2 to 3 percentage points are the practical minimum.
Placement matters as much as accuracy:
- Mount at bird height, roughly at roost level, not near the ceiling where air is warmer and drier.
- Keep it out of direct sun and away from the door, where readings spike every time the coop opens.
- Avoid placing it directly above the waterer, which reads artificially high.
- Add a second unit in larger coops, since humidity stratifies and one corner can be damp while another is dry.
For remote monitoring, a wireless sensor that logs min/max and transmits to a phone catches overnight spikes without a pre-dawn trip, solving the biggest practical problem with manual checks.
Structural Fixes for Coop Moisture Levels
Structural moisture problems come from outside the flock: roof leaks, ground seepage, and poor drainage. No amount of bedding or ventilation fixes water entering through a leaky roof or rising from saturated ground, the half of moisture control most guides skip.
Walk the coop after heavy rain and look for these:
- Water stains or drips on the ceiling and upper walls
- Damp floor edges where the coop meets the ground
- Pooling water around the base after storms
- Rotted or soft wood near the floor line
- Gaps at the foundation that let runoff in
How Water Actually Gets In
Ground seepage is the most misunderstood source. Water does not need a visible gap to enter a coop; it moves through soil by capillary action and hydrostatic pressure, wicking upward through concrete, treated lumber, and even packed gravel until it reaches the floor. A coop sitting directly on grade pulls moisture up for days after rain, and no amount of ventilation dries a floor fed from below.
Roof leaks follow a different path. Water entering at a failed flashing or nail hole often travels along a rafter before dripping, so the ceiling stain is rarely under the actual leak. Trace the water back to its entry point instead of patching the stain.
Fixes That Address the Mechanism, Not the Symptom
- Repair roof leaks at the source. Check flashing around vents and chimneys, reseal nail penetrations, and replace cracked or lifted shingles. Trace stains upward and sideways before patching.
- Break the capillary path. Raise the coop floor at least 6 inches above grade on treated skids or a concrete pad. A floor sitting directly on soil will wick moisture no matter how well you vent.
- Add a gravel drainage bed. A 4- to 6-inch layer of coarse crushed stone under and around the coop gives water somewhere to go that is not your floor. Line the bed with landscape fabric to keep fines from clogging it.
- Grade the ground away from the coop. The soil surface should slope away on all sides so runoff never pools against the base. A common target is a slope of about 1 inch per foot for the first several feet around the structure.
- Install a French drain if the site is chronically wet. A perforated pipe in a gravel trench, wrapped in filter fabric and sloped to a daylight outlet, intercepts subsurface water before it reaches the coop. This is the fix for coops built in a low spot or at the base of a hill.
- Seal gaps at the base with hardware cloth and solid framing, but leave a drainage path, sealing a gap that water is already using just traps the water inside.
- Use a moisture-resistant floor material if you are building new. Sealed plywood, concrete, or composite panels resist wicking far better than untreated lumber.
A Note on Vapor Barriers
Vapor barriers are widely misunderstood in coop construction. A barrier on the wrong side of a wall can trap moisture inside the assembly and cause rot, worse than no barrier at all. In a vented, unheated coop, let walls dry to the outside and focus on keeping liquid water out at the roof and floor rather than sealing the envelope. If you insulate, follow the manufacturer's guidance on which side the vapor retarder belongs.
Frostbite prevention depends on this as much as on temperature. Damp air pulls heat from combs and wattles far faster than dry air, so a structurally dry coop protects birds even on the coldest nights. A coop with a wet floor and leaky roof will frostbite birds at 25°F, while a dry, well-vented coop keeps them comfortable well below that.
Seasonal Coop Moisture Management
Seasonal moisture control changes with the weather. Summer brings humidity and evaporation from spilled water; winter brings condensation from trapped breath and reduced ventilation. Both need the same core routine, adjusted for conditions.
Summer: Focus on waterer spillage and evaporation. Move waterers outside the coop when possible, or set them on a raised, drained platform. Increase airflow with open vents and shaded windows. Watch for pathogen growth in warm, damp litter.
Winter: The temptation is to close everything up. Resist it. Keep high vents open, manage manure daily so it does not add moisture, and use absorbent litter generously. Dry cold is far safer for chickens than damp cold.
Spring and fall: These transition seasons bring rain and temperature swings. Check drainage, refresh bedding more often, and watch for condensation as warm days meet cool nights.
A seasonal maintenance calendar keeps you ahead of problems:
| Season | Main Moisture Threat | Key Action |
|---|---|---|
| Spring | Rain and runoff | Check drainage, refresh bedding |
| Summer | Humidity and spillage | Raise waterers, increase airflow |
| Fall | Temperature swings | Inspect roof, add dry litter |
| Winter | Condensation and frostbite | Keep vents open, manage manure daily |
Why Moisture Management Protects Your Whole Flock
Respiratory health, feather condition, and egg production all trace back to coop moisture. Damp environments breed pathogens, ammonia irritates airways, and wet feathers lose their insulating value. Get moisture right and most other coop problems shrink on their own.
Small coops need the same discipline as large ones. A backyard setup with eight birds still accumulates moisture fast because air volume is limited. The fixes scale down but do not change: ventilate, absorb, monitor, maintain.
Arden Line's zeolite coop deodorizer fits into that routine as the absorption layer that keeps working after bedding saturates. It is chemical-free, fragrance-free, and safe around birds and gardens.
Frequently Asked Questions
What is the ideal humidity range for a chicken coop?
Keep coop relative humidity between 50% and 70%, with 60% to 70% being the practical target for most backyard flocks. Below 50% dries out respiratory tissues; above 70% encourages pathogen growth and ammonia release from wet litter. A $15 hygrometer mounted at roosting bar height gives you real numbers instead of guessing. Check it twice daily during rainy or humid stretches.
How does high moisture contribute to ammonia buildup in coops?
Ammonia forms when bacteria break down uric acid in chicken manure, and that process speeds up in wet litter. When bedding stays damp, fecal moisture feeds the bacteria and ammonia levels climb fast. Dry litter slows the reaction. This is why moisture control and ammonia control are the same job. A mineral amendment like Arden Line Zeolite Coop Deodorizer traps ammonia and moisture at the source rather than masking the smell.
What are the signs of excessive moisture in a chicken coop?
Watch for condensation on windows and metal fixtures, damp or clumped bedding, a sharp ammonia smell when you open the door, and frostbite on combs and wattles in winter. Chickens with wet, matted feathers or persistent respiratory symptoms also point to a moisture problem. If you find mold on wood surfaces or notice manure that stays wet for days, the coop is holding too much water.
How often should bedding be changed to control humidity?
With the deep litter method, turn bedding weekly and do a full change every 4 to 6 months. Standard bedding needs a full change every 2 to 4 weeks. Spot-remove wet patches and droppings daily. If you use a moisture-absorbing mineral like zeolite underneath the bedding, you can stretch the interval because it keeps the base layer drier longer.
Damp coops create damp problems: ammonia, frostbite, and sick birds. Arden Line offers a natural, mineral-based answer that traps ammonia and moisture at the source instead of masking it. Made from 100% volcanic zeolite, our coop deodorizer is chemical-free, fragrance-free, and OMRI Listed for organic production. Get started with Arden Line and keep your coop dry, your air clean, and your flock healthy.



Leave a comment
This site is protected by hCaptcha and the hCaptcha Privacy Policy and Terms of Service apply.