
Table of Contents
- Why Urban Garden Soil Nutrients Need a Different Approach
- Step 1: How to Test Garden Soil Nutrients in Small Plots
- Step 2: Build Organic Matter With Compost and Mulch
- Step 3: Choose the Best Organic Soil Amendments for Urban Gardens
- Step 4: The Benefits of Zeolite for Soil Moisture and Nutrients
- Step 5: Fix Compaction and Manage Container vs. In-Ground Nutrients
- Step 6: Address Heavy Metals and Micro-Nutrient Deficiencies Safely
- Frequently Asked Questions
Last Updated: September 27, 2026
Why Urban Garden Soil Nutrients Need a Different Approach
Urban garden soil is not farm soil. It sits in raised beds, containers, and small plots that lose nutrients fast.
Step 1: How to Test Garden Soil Nutrients in Small Plots
The best way to test garden soil nutrients in small plots is a home test kit plus a lab sample once a year. Home kits give fast pH and major-nutrient readings; a lab test gives the full picture, including cation exchange capacity (CEC).
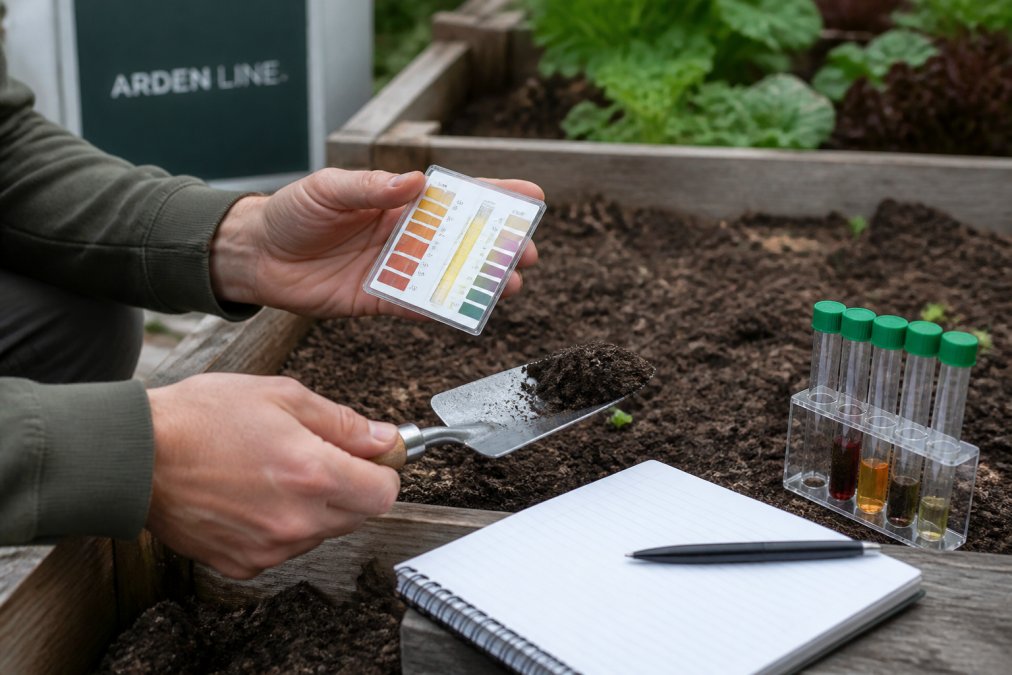
Start with a simple approach:
- Pull soil from 4-6 spots in each bed, 6 inches deep
- Mix the samples in a clean bucket
- Test pH first, since it controls nutrient availability
- Send a cup of the mix to a lab for CEC and base saturation
Reading pH, CEC, and Base Saturation Results
pH measures how acidic or alkaline your soil is. Most vegetables grow best between 6.0 and 7.0. Outside that range, nutrients lock up and roots cannot take them in.
Step 2: Build Organic Matter With Compost and Mulch
Organic matter is the foundation of healthy urban garden soil: it feeds soil life, improves structure, and holds water and nutrients.
- Compost feeds microbes and adds slow-release nutrients
- Mulch holds moisture and cuts weeds
Step 3: Choose the Best Organic Soil Amendments for Urban Gardens
The best organic soil amendments for urban gardens match your test results. Do not buy blindly, read the report first.
| Soil Problem | Amendment | What It Does |
|---|---|---|
| Low phosphorus | Bone meal | Slow-release phosphorus for roots and blooms |
| Low potassium | Kelp meal | Adds potassium and trace minerals |
| Low overall fertility | Compost | Builds organic matter and feeds microbes |
| Poor drainage | Zeolite | Improves aeration and holds moisture |
| Low CEC | Compost plus zeolite | Raises nutrient-holding capacity |
Bone Meal, Kelp Meal, and Mineral Amendments
Bone meal is a slow-release phosphorus source. It works well for root crops and flowering plants.

Step 4: The Benefits of Zeolite for Soil Moisture and Nutrients
One of the clearest benefits of zeolite for soil moisture and nutrients is its ability to hold both in the root zone. This porous volcanic mineral traps water and positively charged nutrients like potassium and ammonium, then releases them slowly.

For urban gardens, that means:
- Less frequent watering
- Less fertilizer washing away
- Better soil aeration and drainage
- Reduced compaction over time
Step 5: Fix Compaction and Manage Container vs. In-Ground Nutrients
Compaction and container growing look similar, tight roots, slow growth, yellowing leaves, but they fail for opposite reasons and need opposite fixes. Treating a compacted bed like a pot, or a pot like a bed, wastes money on amendments.
Fixing Compaction in Beds and Raised Plots
Compaction happens when soil particles pack tight and squeeze the air out. Roots need oxygen, water needs to move, and nutrients travel in solution; when pore space collapses, all three stall. Urban soils compact fast from foot traffic, repeated digging at the same depth, and heavy clay.
Zeolite Mineral Lava Rocks (Regular) →
- Stay off beds when soil is saturated; one pass on wet clay can undo a season of improvement.
- Loosen the top 6-8 inches with a broadfork or garden fork, not a tiller, which creates hard clods and a plow pan in wet soil.
- Work in 2-3 inches of finished compost each spring, the single most reliable structural fix.
- Add a mineral amendment like zeolite to hold pore space open and keep water and nutrients in the root zone.
- Mulch the surface; bare soil crusts over after rain and seals the top layer.
- Designate permanent paths so you never step in the growing area.
Why Containers Behave Nothing Like Beds
Containers are a different system. A raised bed has large soil volume, contact with native ground, and a slow moisture gradient; a pot has small volume, a drainage hole, and a rapid wet-dry cycle that drives nutrient loss beds never see.
- Leaching is the dominant loss. Every thorough watering pushes dissolved nitrogen, potassium, and sulfur out the bottom; in a bed, those nutrients stay in the root zone.
- Volume limits buffering. A 10-gallon pot holds a fraction of the CEC of even a small bed, so pH and nutrient levels swing faster.
- Media breaks down. Peat and coir mixes shrink and compact over a season, reducing air space and water-holding capacity. Refresh or top-dress annually.
- Salt builds up. Synthetic fertilizers leave salts behind; flush containers with plain water every few weeks.
Matching Your Feeding Strategy to the System
| Factor | In-Ground Beds | Containers |
|---|---|---|
| Watering | Every few days, deeper soak | Often daily in summer |
| Fertilizing | Monthly, moderate dose | Every 2-3 weeks, smaller dose |
| Leaching risk | Moderate | High |
| pH stability | Slow drift | Fast swings |
| Best base amendment | Compost plus mulch | Compost plus zeolite plus slow-release feed |
| Annual refresh | Top-dress compost | Replace or blend one-third of media |
A Practical Container Routine
- At planting, blend one part finished compost into three parts growing mix and add a slow-release organic fertilizer at the label rate.
- Mix in a moisture- and nutrient-holding mineral like zeolite so water and cations stay in the root zone between waterings.
- Feed every 2-3 weeks during active growth with diluted liquid organic fertilizer; small, frequent doses beat one large dose.
- Flush with plain water every few weeks to clear salt buildup.
- Top-dress with compost midseason to replace what leaching removed.
- At season's end, refresh at least one-third of the media before replanting.
A Practical Bed Routine
- Top-dress with 1-2 inches of compost each spring and let worms and soil life work it in.
- Mulch with 2-3 inches of straw, leaves, or wood chips kept on the surface.
- Fertilize based on your soil test, not a calendar; beds hold nutrients far longer than pots.
- Recheck pH and CEC every year or two, since compost and irrigation water slowly shift both.
The takeaway: beds reward building structure and holding capacity over time, while containers reward frequent, small inputs and a media that resists leaching. Get the system right and both outperform a one-size-fits-all feeding plan.
Step 6: Address Heavy Metals and Micro-Nutrient Deficiencies Safely
Urban soils carry risks farm and suburban soils usually do not: lead from old exterior paint and leaded gasoline, arsenic from pressure-treated lumber and older orchard sprays, and cadmium from some galvanized metals and batteries. This section gives you the testing protocol, remediation steps, and a diagnostic guide for micro-nutrient problems misdiagnosed as disease.
Testing for Lead and Other Heavy Metals
Do not guess. Test before planting food crops, especially in neighborhoods with pre-1978 housing, near busy roads, or on land with a commercial or industrial past.
- Collect soil from the top 6 inches, where roots and hands contact it. Pull 8-12 cores per growing area and mix them in a clean plastic bucket.
- Use a clean stainless steel or plastic trowel; avoid galvanized tools, which can skew zinc readings.
- Submit the composite to a lab running EPA-recognized methods. Many state extension and commercial labs offer a lead screen for a modest fee, and some municipal programs provide free or reduced-cost testing in older neighborhoods.
- Ask specifically for lead (Pb), arsenic (As), and cadmium (Cd); a standard fertility panel does not include them.
What to Do If Levels Are High
No amendment removes lead from soil. The practical fixes are dilution, separation, and exposure reduction.
- Build up, not in. Raised beds with at least 8-12 inches of clean imported topsoil and compost, lined at the base with landscape fabric, keep roots out of contaminated ground.
- Cap the ground. Where you are not growing food, cover bare soil with mulch, gravel, or grass to stop dust and tracking.
- Wash and peel. Root vegetables and leafy greens hold the most soil particles; peel carrots and beets, discard outer leaves, and rinse in running water.
- Keep pH near neutral to slightly alkaline. Lead is more mobile and more readily taken up in acidic soil; lime to hold pH around 6.5-7.0.
- Add phosphate and organic matter. Phosphate binds lead in soil and compost reduces bioavailability, lowering uptake without cleaning the soil.
- Control dust and mud. Take shoes off at the door, wash hands after gardening, and dampen dry soil before working it.
Diagnosing Micro-Nutrient Deficiencies
Most urban gardeners jump to NPK when leaves yellow. In reality, iron, magnesium, manganese, zinc, and boron shortages are common in containers and raised beds, usually caused by pH drift or leaching, not a true soil shortage.
- Iron (Fe): New leaves yellow between green veins, starting at the top. Common in alkaline soil and containers where pH crept above 7.0; lower pH with elemental sulfur or use chelated iron.
- Magnesium (Mg): Older leaves yellow between veins while veins stay green, often with a reddish tint on tomatoes and peppers. Epsom salt at a light rate, or dolomitic lime if pH also needs raising, corrects it.
- Manganese (Mn): Interveinal yellowing on young and middle leaves, sometimes with gray speckling. Rare in acidic soil, more common in over-limed beds.
- Zinc (Zn): Short internodes, small new leaves clustered at tips, and general stunting. Common in sandy potting mixes and high-phosphorus soil, which blocks zinc uptake.
- Boron (B): Hollow stems, cracked fruit, and distorted growing tips. Boron has a narrow safe range, so apply only if a test confirms the shortage.
Fix pH First, Then Feed
Before buying a micro-nutrient product, retest pH. Iron, manganese, and zinc become less available as pH climbs, and magnesium competes with calcium and potassium. Correcting pH into 6.0-7.0 often resolves the symptom without any product. When you do feed, kelp meal and compost provide a broad, gentle trace-mineral boost that is hard to overdose.
- Test for heavy metals before planting food crops in older or industrial-adjacent sites
- Use raised beds with clean soil if lead or arsenic is elevated
- Correct pH before adding any micro-nutrient product
- Match the symptom to the nutrient, then confirm with a test
- Keep mulch, compost, and clean hands in the routine to cut exposure
Frequently Asked Questions
What is the 70/30 rule in gardening?
The 70/30 rule refers to blending roughly 70 percent soil or compost with 30 percent drainage material, such as coarse minerals or perlite, when filling raised beds and containers. Urban gardeners use this ratio because native ground soil is often compacted clay that holds water and suffocates roots. A 70/30 mix gives roots airflow, prevents waterlogged pockets, and still holds enough organic matter to feed plants through the season. Adjust toward more drainage material for succulents and herbs, and less for thirsty vegetables.
How do you test soil nutrients in small urban plots?
Start with a lab or cooperative extension test if you can, since it measures pH, phosphorus, potassium, and cation exchange capacity in one pass. For small plots, collect six to eight cores from the top six inches, mix them in a clean bucket, and send about a cup of the blended sample. Home test kits work for quick pH checks between lab tests. Test containers separately from in-ground beds, because potting mixes leach nutrients faster and hold different baseline levels.
What should I add to soil to replenish nutrients?
Compost is the foundation: two to three inches worked into the top layer restores organic matter and feeds soil biology. Follow with targeted amendments based on your test results, such as bone meal for phosphorus, kelp meal for potassium and trace minerals, and a slow-release mineral like zeolite to hold nutrients in the root zone instead of letting them leach away. Reapply compost each season, since urban soils lose organic matter quickly to runoff and compaction.
How do I know if slow drainage is a moisture problem or compaction?
Push a screwdriver into damp soil. If it slides in easily but water still pools, you likely have a moisture retention problem, and a porous mineral amendment such as zeolite can help by absorbing excess water and releasing it slowly. If the screwdriver stops halfway, compaction is the issue, and you need aeration, added organic matter, and reduced foot traffic. Many urban beds have both, so address compaction first, then improve moisture balance.

Leave a comment
This site is protected by hCaptcha and the hCaptcha Privacy Policy and Terms of Service apply.